Introduction
The GBVIMS Module is a data entry, reporting, and case management tool to help you collect, store and analyze information on gender based violence survivors. There is a standard set of forms set forth by the Steering Committee. that we recommend using, however your Site Administrator may have to configure these forms specific to your location and needs. For any questions about the forms and information you have or need, please reach out to your Site Administrator.
Logging In
Logging into Primero and you’ll see a Username and Password boxes. Click in the Username box and type in your unique user name provided to you. Then enter your password in the field below.

Navigating Primero
Header Navigation Bar
The header navigation is the dark bar across the top of the screen in which you navigate to your home page (or dashboard), Cases, Incidents, and Reports. It also has a quick search field that can help you find a specific case quickly. Your current page will be highlighted. See below:

Dashboard or Home page
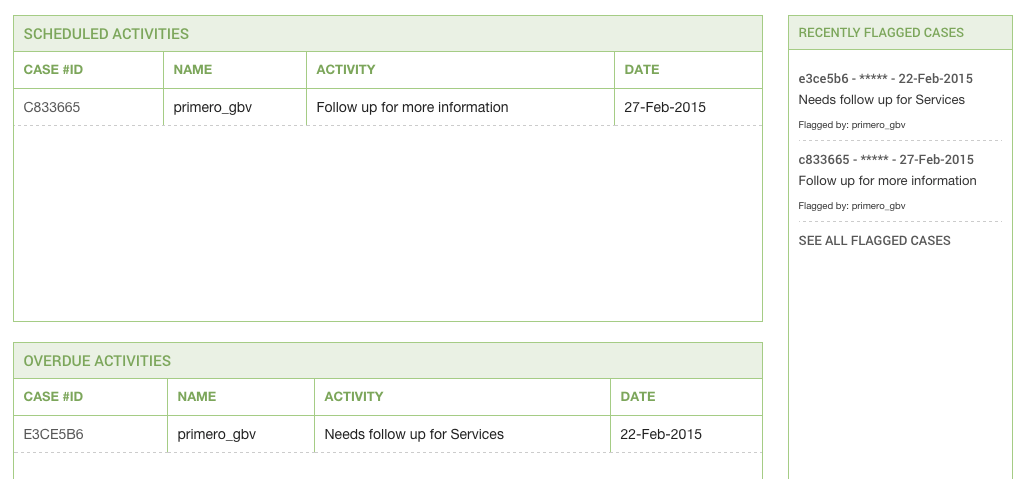
The Dashboard, or Home Page, is where you can find most of the relevant and significant information around your cases and incidents. It contains a number of different features including your schedule, recently flagged cases or incidents, and flags from your manager in the Recently Flagged Cases.
List View
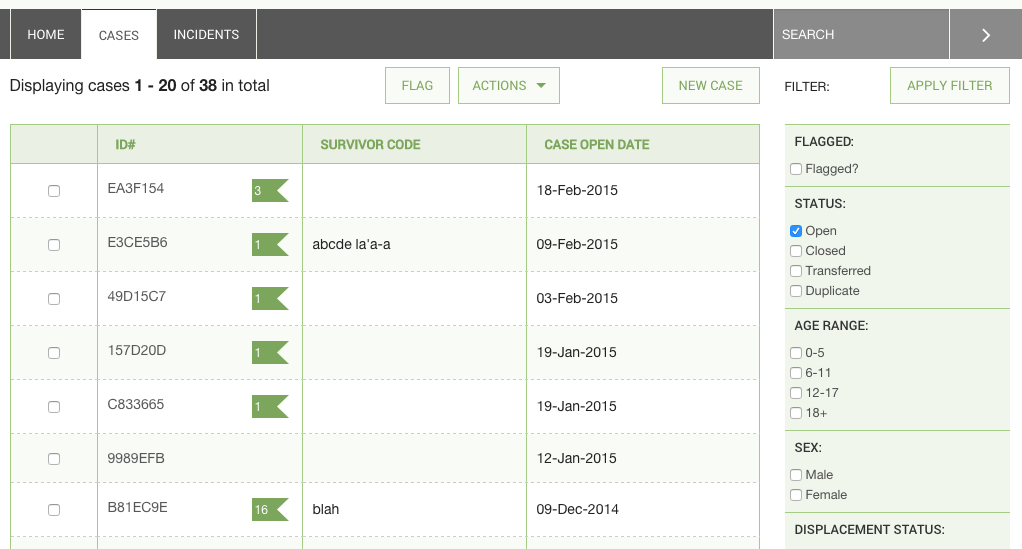
When selecting the record type or page you want to visit via the header navigation, you can see all cases or incidents that belong to you when you click on CASES or INCIDENTS. Once there, you see a list records, that you are able to filter and/or sort. See below:
Edit and View a record
When creating a new record, you automatically are brought to the “Edit” page for that record. You can enter in all the relevant information you need at this time and save when done.
When selecting an existing record, you are brought to “View” the record. This means you can view all the data and forms you have permission to, but cannot edit. You must click the Edit button in the Action Buttons section of the header to change any information that is currently represented.
Action Buttons
Our Action Buttons are the buttons just below our Header Navigation, which allow a user to perform an action on a case or cases. The actions, depending on your permissions, are:
Flag
Export
Import (List View)
Transfer
Refer
Save (edit view only)
Cancel (edit view only)
This bar, along with the Header Navigation bar, are part of what is called the Anchored Header. Meaning, they never leave the screen when scrolling. This allows a user to easily navigate or act on a case of number of cases at any time.
My Account and Contact & Help links
Above the Header Navigation bar, there are small links that bring you to pages that help you manage your account and contact information, as well as find out who is your site administrator.
Creating a New Case
When creating a new case, use the Actions Buttons area of the header there is a “Create” button that will open up the forms to enter information. See the Create button below:

Once in the forms, you can navigate to different forms as we describe in the Navigating section.
Creating an Incident from a New Case
Once a case is created, you can then create an incident that is linked to that case. In the Action Header Bar, there is a button named CREATE INCIDENT once you have saved the case.

Click on this button, and you will be redirected to the Incident forms to create a linked incident.
Once in the incident, you can navigate to the proper forms to enter information about the incident, perpetrator, etc., using the Form Navigation panel.
Creating a New Incident
When creating a new incident without a case, use the Actions Buttons area of the header there is a “Create” button that will open up the forms to enter information. See the Create button below:

Once in the forms, you can navigate to different forms as we describe in the Navigating section.
Navigating Primero Forms
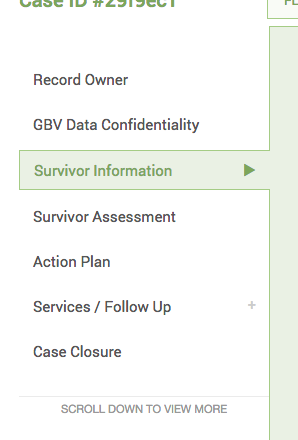
Once you are creating or editing a form, you will see a left panel navigation list. This list is an organized way to navigate through your forms. The initial titles you see are called Form Groups and set up by your site administrator. The current form you are on will be highlighted - see below:
If a Form Group has only one form, you can simple click on it and it will display the form. If it has more than one, you can click on the Form Group name or the expand icon to the right of the name to expand it and see all the forms in the group. Once expanded you can then click on any of the form names to enter into the chosen form.
Navigating Sub-Forms
In certain data sets and forms, we find that information pertaining to an event or survivor is nearly identical. For example, information on specific follow ups can be the same form, just labeled per follow up type and date. So in cases like this, we’ve designed these forms as “sub-forms” and you manually add additional individual forms to add informaton on family members, individual follow ups, etc. To navigate those, there is an expand/collapse function, and an add and remove function.
Updating or Editing a Case
Once you’ve entered into the case you would like to update, you must click the EDIT button in the actions header. The page will then refresh and allow you edit individual form fields.
There are a number of different field types in which you can edit differently.
Text - Type normally using your keypad or keyboard.
Text Area - Similar to the Text field but can contain
more information. Type normally, the field expands for more information as you continue to enter information.
Date - Multiple ways to edit
You can type in a numerical date in the format of dd-mm-yyyy
You can type in the first three letters of the month in the
format of 01-Jan-2014
You can use the calendar widget to navigate to the correct day
and select it directly
Check Boxes - You may click (select) one or many of the options
Tick Box - You may click on the box - used for yes/no only
questions
Select Drop Down - Multiple ways to edit
You may click in the field and scroll to your answer. Then click
to select it.
You may begin typing your answer to show in the
selection dropdown. Example: for locations, there are hundreds to scroll through, but if you know your location, you can begin to type it and the values will change with your input.
Radio Button - Similar to Tick Box, click on the correct
answer - used for yes/no/unkown or other similar selections
Numeric Field - Key the number into the field.
Transfers and Referrals
Transfers
Transferring is handing over complete care for the survivor to another service provider with the survivor's informed consent. This signals that the case will no longer be handled by the organization that is the source of the transfer. There are some processes surrounding this for a transfer to a non-primero or outside your instance user. But those will be determined by your organization and the Standard Operating Procedures (SOP) of the organization of the person you are transferring to.
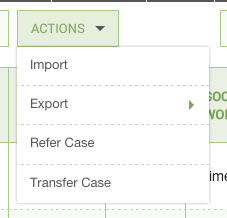
To Transfer a record from either the individual record page or the list view, click on the ACTIONS button in the Action Header. Then, click on the options for 'Transfer'.
The following modal form will appear and allow you to select options for your transfer. This form will allow you to select the “Existing User”, which is a user within your instance of Primero. If the desired user to transfer to is not in the drop down, it means this user does not have privileges to be transferred to.
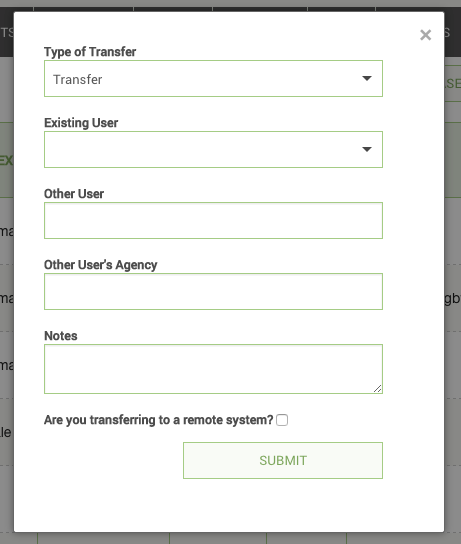 To transfer to a user outside of your primero instance, you select the
checkbox at the bottom of the form, to create a transfer export file
(.JSON or “Primero” format) that is password protected to be shared
outside the system.
To transfer to a user outside of your primero instance, you select the
checkbox at the bottom of the form, to create a transfer export file
(.JSON or “Primero” format) that is password protected to be shared
outside the system.
Referrals
Referring is contacting another service provider to help meet the survivors needs with the informed consent of the survivor. When caseworkers share information with other service providers who can help the survivor meet their specific needs. For referrals outside of Primero or to non-Primero users, you will need to determine the appropriate steps. But those will be determined by your organization and the Standard Operating Procedure (SOP) of the organization of the person you are referring to.
To Refer a record from either the individual record page or the list view, use the ACTIONS button in the Action Header to initiate the drop down of options. Within the options, select Refer.

The following modal form will appear and allow you to select options for your refer. This form will allow you to select the “Existing User”, which is a user within your deployment of Primero. If the desired user to transfer to is not in the drop down, it means this user does not have privileges to be referred to.
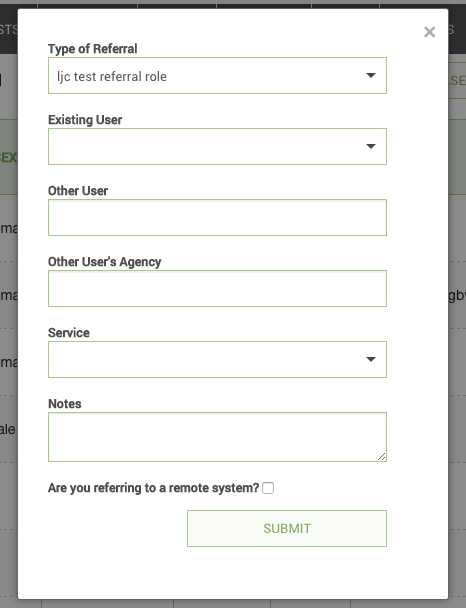
To refer to a user outside of your primero instance, you select the checkbox at the bottom of the form, to create a refer export that is password protected to be shared outside the system.
Filtering
Filtering your Case List or search results is an efficient way to narrow down to the case or cases that need your immediate attention. You can filter the list to show not only if a case has other characteristics but contains specific information within those characteristics as well. For example, you can filter by males only, but you can also filter by specific type of violence, and the registration or incident date range.
The Filter panel is on visible on search results page or when you click CASES tab in the header. See below:
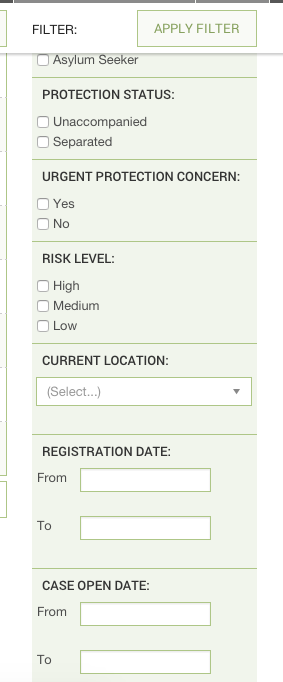
In the image, there is the normal checkbox filter selection, in which you click, but also date range and drop down fields. For Date Ranges, you can enter these using any of the Date field type actions. You can set the range for one day as well. For the Drop Down field, this is clickable and you can only select one value.
Quick Search
Quick Search refers to the search field in the header navigation bar. From here you can type in your search and return a list of possible matches. This is useful when searching for a specific name or case ID. After searching, you can filter results further. Currently, this returns exact matches only.
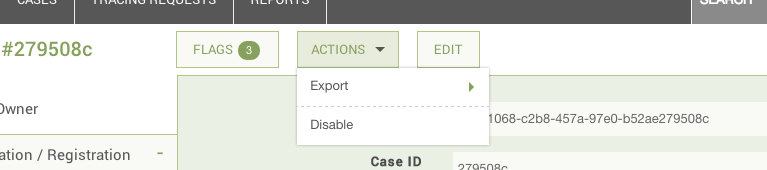
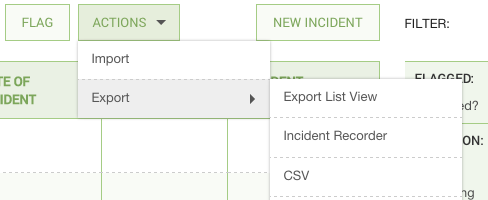
Exporting Information
Exporting individual cases/incidents or a list of cases/incidents can be useful in a number of ways. This action can be found in the ACTIONS header button which will display a drop down to select what format you want to export - PDF, XLS, CSV, etc.
Once you’ve selected your format, the export modal window will appear, allowing you to set your own password for the file, and name the file accordingly. When exporting, you export ALL information available in the record, including blank fields.

To Export a list of cases, while in the case list view, you can select as many as you’d like to export via the check boxes:

To Export all cases, you can leave all unchecked and it will export all cases you have access to.
To Export a single case, you can either check only that case in the case list, or enter into the case to view it, then use the ACTIONS button to export.
Custom Export
This feature will most likely not be available to the average user. If you find yourself in need of this, and do not have access, please contact your site administrator.
If you use the custom export, you can select individual forms and even fields to be exported and their format.

The process begins with Select Format. This organizes the information you’ve selected into tabs per “Form” when selected, or one tab with a long row of “Fields” when selected. You then select the Module from the drop down that will populate the appropriate forms and field available using the Select Drop Down functionality described earlier in the Field Types section.